How to Upscale a Low-Resolution Image?
In a digital-first world, where visual content is king, low-resolution images can make or break your presentation. Whether it’s a cherished old photo, an artistic piece, or a product image that looks unappealing, enhancing and upscaling low-resolution images is an essential skill.
This blog explores how to transform blurry, pixelated images into high-resolution masterpieces using modern tools. Among these, ImgUpscaler.AI emerges as a reliable and efficient solution, leveraging AI to produce stunning results in seconds. Let’s dive into the best ways to upscale images and make them ready for any platform.
What Does “Upscaling” Mean?
"Upscaling an image" refers to the process of increasing the resolution or size of a digital image. This is done to improve the image's appearance when displayed on larger screens or higher-resolution devices. Here's a more detailed explanation:
- Resolution Increase: Upscaling involves increasing the number of pixels in an image. For example, an image with a resolution of 640x480 pixels might be upscaled to 1280x960 pixels or higher.
- Interpolation: Since upscaling adds more pixels, some form of interpolation is used to estimate the color values of the new pixels based on the surrounding pixels in the original image. Common interpolation methods include nearest-neighbor, bilinear, and bicubic interpolation.
- Quality Impact: While upscaling can make an image appear larger and potentially clearer on high-resolution displays, it does not add details that were not present in the original image. In some cases, upscaling can introduce artifacts or blurriness if the increase in resolution is too drastic relative to the original image's quality.
- Algorithms: Advanced algorithms, such as machine learning-based techniques, can be used to upscale images more effectively. These algorithms can analyze patterns and textures in the original image to create more accurate and detailed upscaled images.
- Applications: Upscaling is used in various applications, such as:
- Enhancing the quality of old photos or low-resolution images.
- Preparing images for high-resolution displays or large-format printing.
- Converting standard definition (SD) images to high definition (HD) or 4K for better viewing on modern devices.
- Limitations: It's important to understand that upscaling has its limitations. While it can improve the appearance of an image, it cannot create new information that was not present in the original. The quality of the upscaled image is inherently linked to the quality of the source material.
In summary, upscaling an image is about increasing its pixel dimensions to enhance its display on larger or higher-resolution screens, but the effectiveness of this process depends on the original image's quality and the upscaling technique used.
Why Do Low-Resolution Images Need Upscaling?
Low-resolution images often need upscaling for several reasons, primarily related to improving their appearance and usability in different contexts. Here are some key reasons why upscaling is necessary or beneficial:
- Display Compatibility: Modern devices, such as high-definition TVs, monitors, and smartphones, have higher resolution screens. Low-resolution images may appear pixelated or blurry on these devices. Upscaling helps to make these images more compatible with high-resolution displays.
- Print Quality: When printing images, higher resolution is often required to ensure that the printed output is clear and detailed. Upscaling low-resolution images can help achieve better print quality, especially for large-format prints.
- Aesthetic Improvement: Upscaling can improve the aesthetic appeal of images, making them look cleaner and more professional. This is particularly important for images used in marketing materials, presentations, or any context where visual quality is crucial.
- Enhanced Detail: While upscaling does not add new details that were not present in the original image, it can help to reduce the visibility of pixelation and make the existing details more apparent, which can be beneficial for images that are meant to be viewed at a larger size.
- Archival Restoration: For historical or archival images, upscaling can help to restore and enhance the visual quality, making them more accessible and enjoyable for modern audiences.
- Content Creation: In content creation, such as video editing or graphic design, it's common to work with a variety of image sizes and resolutions. Upscaling allows for greater flexibility in using low-resolution images in high-resolution projects without a significant loss in quality.
- Accessibility: For websites and applications, upscaling images can ensure that content is accessible and looks good on a wide range of devices with different screen resolutions and sizes.
- Machine Learning and AI: Advanced upscaling techniques, such as those using machine learning, can predict and generate missing details to a certain extent, which can be particularly useful in applications like facial recognition or medical imaging.
- Cost-Effective Solution: Upscaling can be a cost-effective solution when obtaining high-resolution images is not feasible, either due to budget constraints or the unavailability of high-resolution versions of certain images.
While upscaling can improve the appearance of low-resolution images, it's important to manage expectations. The quality of the upscaled image will always be limited by the quality and resolution of the original image, and there are inherent limits to how much an image can be improved through upscaling alone.
Methods to Upscale Low-Resolution Images
Traditional Methods to Upscale Low-Resolution Images
Editing software like Photoshop or GIMP allows you to manually upscale images by adjusting resolution and sharpening the output.
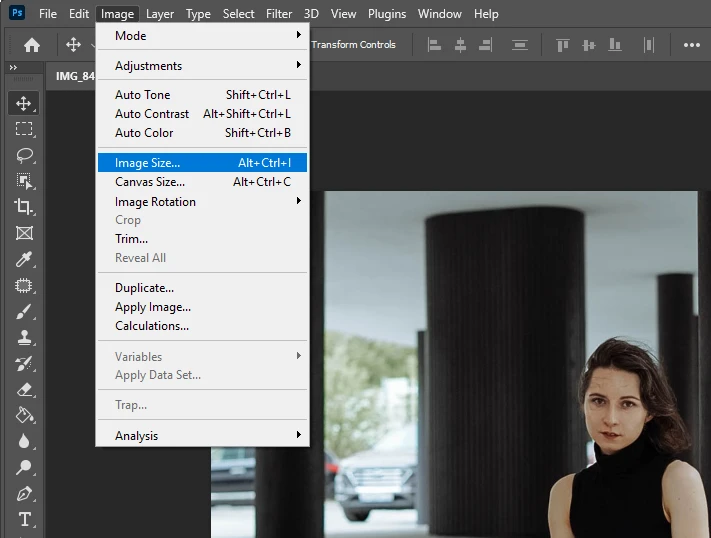
Steps in Photoshop:
- Open the image file.
- Navigate to Image > Image Size.
- Set higher dimensions for the image while retaining the aspect ratio.
- Apply sharpening tools like "Unsharp Mask" or "High Pass" for clarity.
Pros:
- Offers precise control over adjustments.
- Suitable for professionals familiar with the software.
Cons:
- Requires significant time and expertise.
- Results may not match AI-powered tools in terms of detail recovery.
Using AI-Based Tools to Upscale Low-Resolution Images
AI-powered tools have transformed the upscaling process, making it faster and more effective. Advanced tools like ImgUpscaler.AI, Let’s Enhance, and Gigapixel AI use machine learning to analyze images and intelligently add details while preserving their natural look.
The Best Tool for Image Upscaling – ImgUpscaler.AI**
What is ImgUpscaler.AI?
ImgUpscaler.AI is an AI-driven image enhancement and upscaling tool designed for efficiency and quality. It’s perfect for individuals and businesses aiming to enhance image resolution without compromising detail or clarity.
Key Features:
- AI-Powered Enhancements: Automatically analyzes and sharpens images.
- Supports Various Formats: Works seamlessly with PNG, JPG, JPEG, and WEBP.
- Completely free: ImgUpscaler.AI is completely free with no hidden expenses and the enlarged and enhanced images have no branded watermarks.
- Batch Processing: Enhance multiple images simultaneously for better productivity.
- Data Privacy: Ensures secure processing and deletes uploaded files after completion.
How to Upscale an Image with ImgUpscaler.AI?
- Upload Your Image: Drag and drop the image onto the ImgUpscaler AI interface.
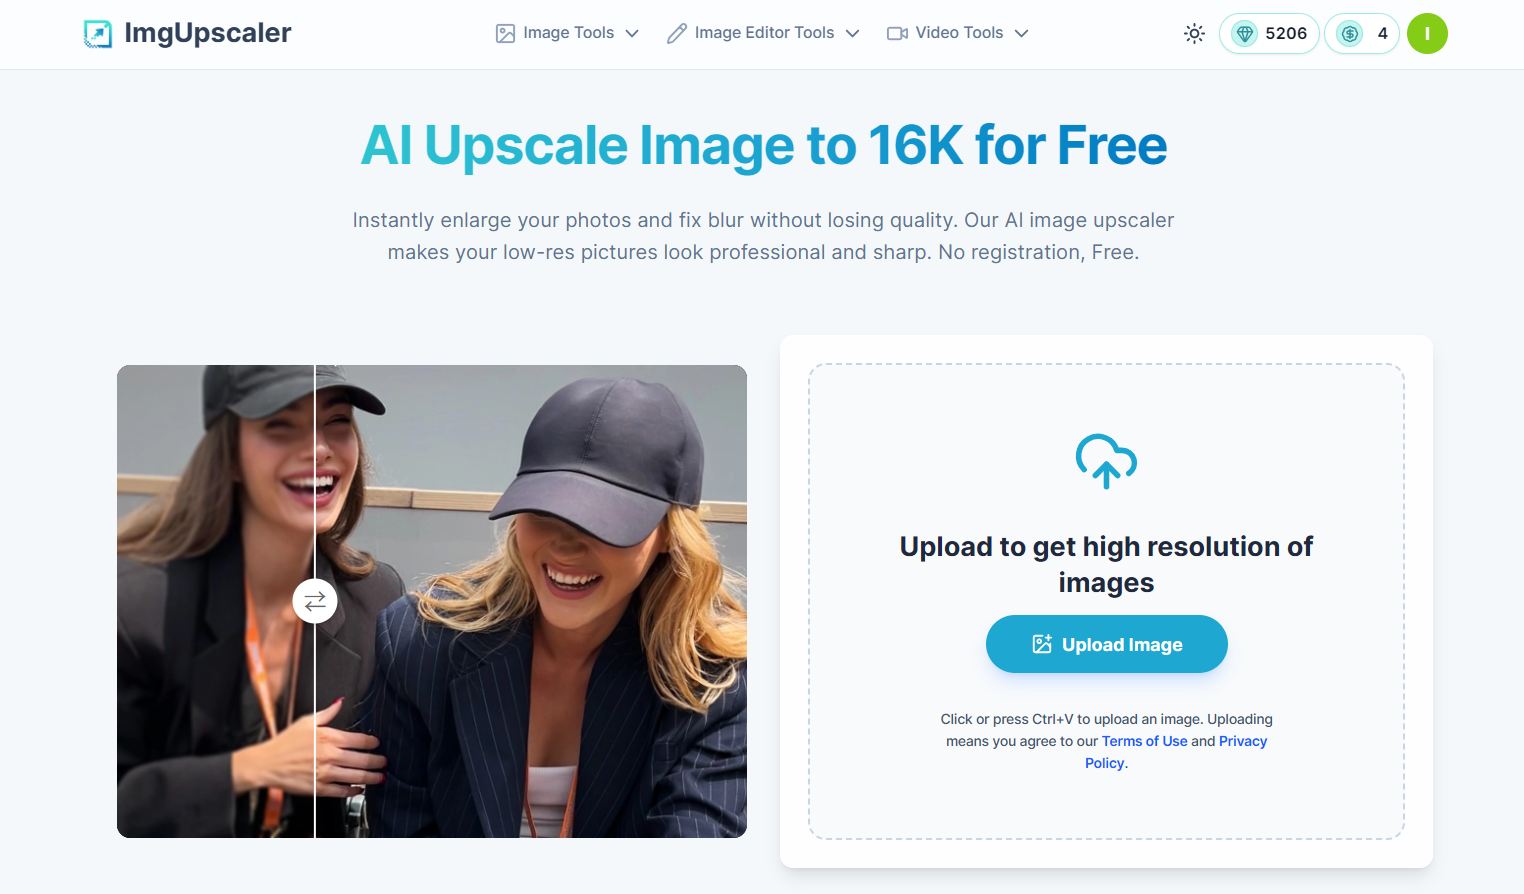
- Select Preferences: Choose the desired upscaling resolution and output format.
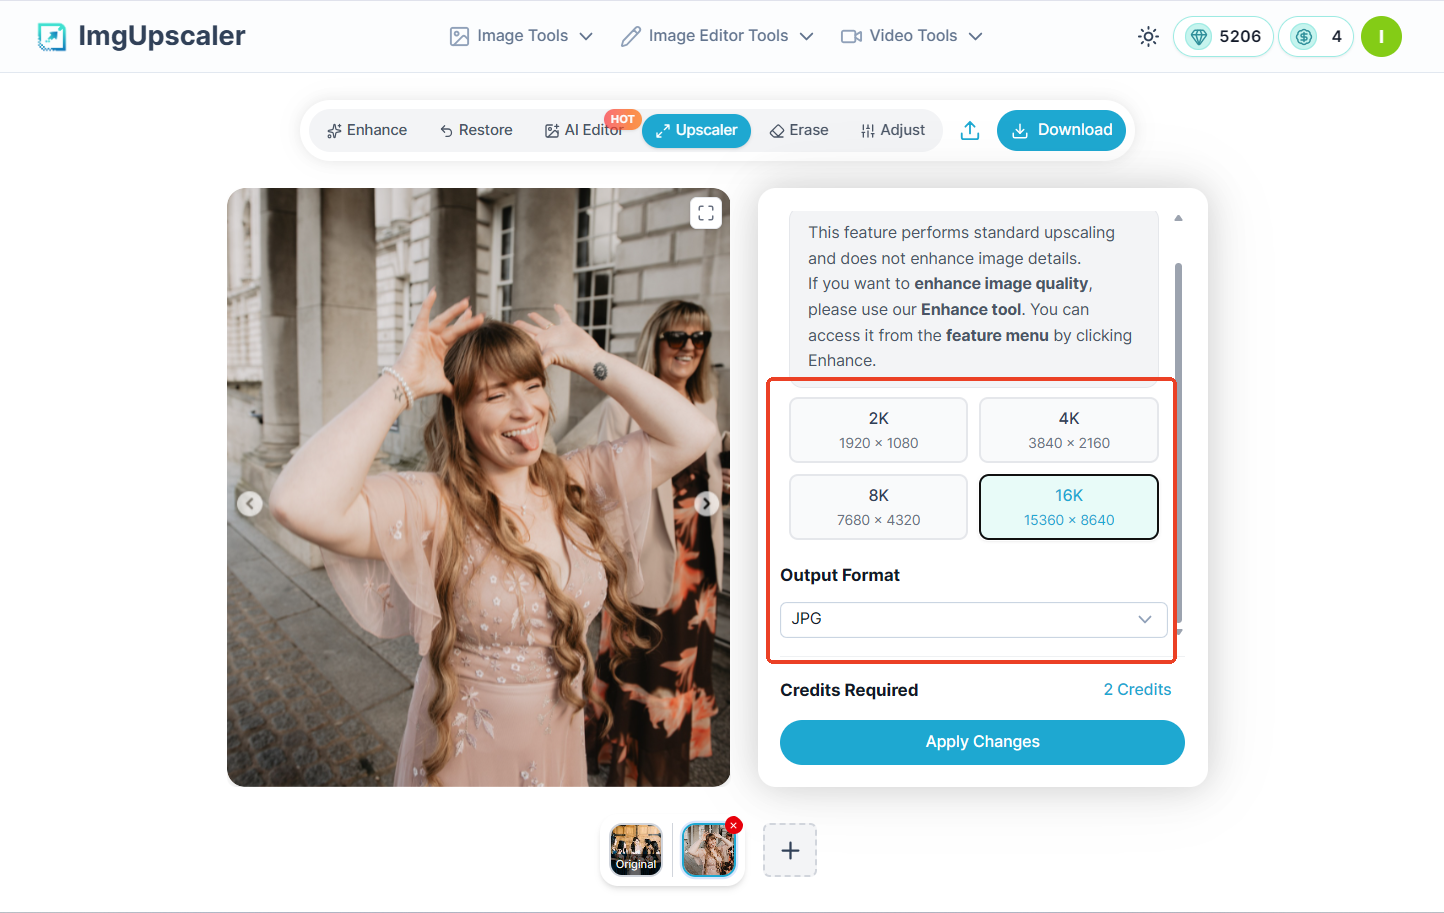
- Download the Final Result: Save the enhanced image in your preferred format.
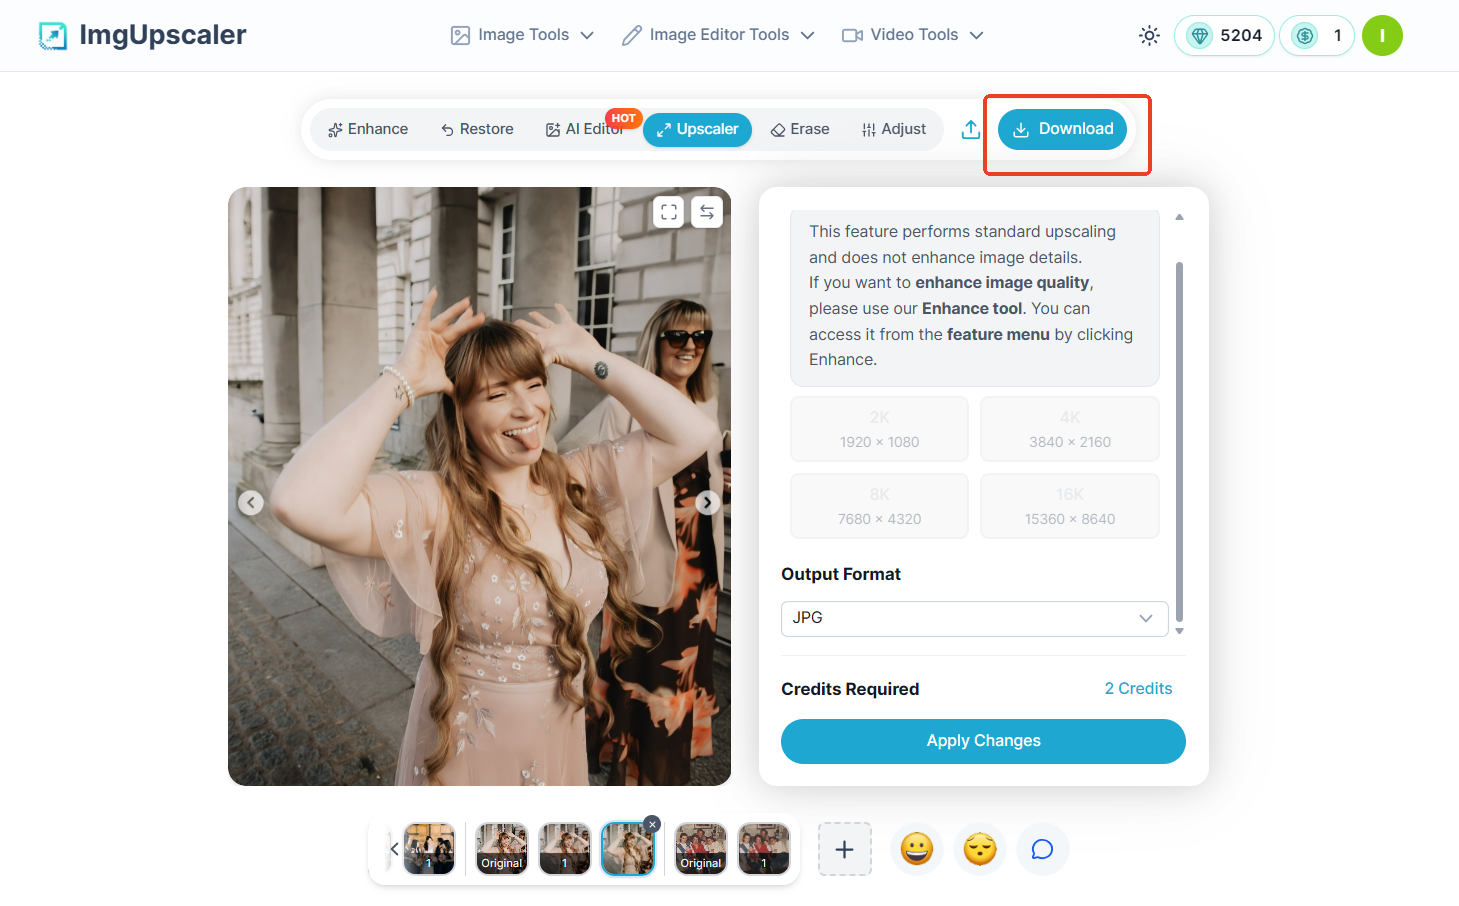
ImgUpscaler.AI makes the process intuitive, even for users with no prior experience.
Best Practices for Upscaling Images
To achieve optimal results when upscaling images, consider these tips:
- Use High-Quality Originals: Start with the best possible version of the image for enhanced output.
- Rely on AI for Precision: AI tools like ImgUpscaler.AI handle complex details better than manual methods.
- Maintain Proportions: Avoid stretching or distorting the image.
- Avoid Over-Editing: Excessive sharpening or noise removal can make images appear unnatural.
Top Image Upscaling Tools
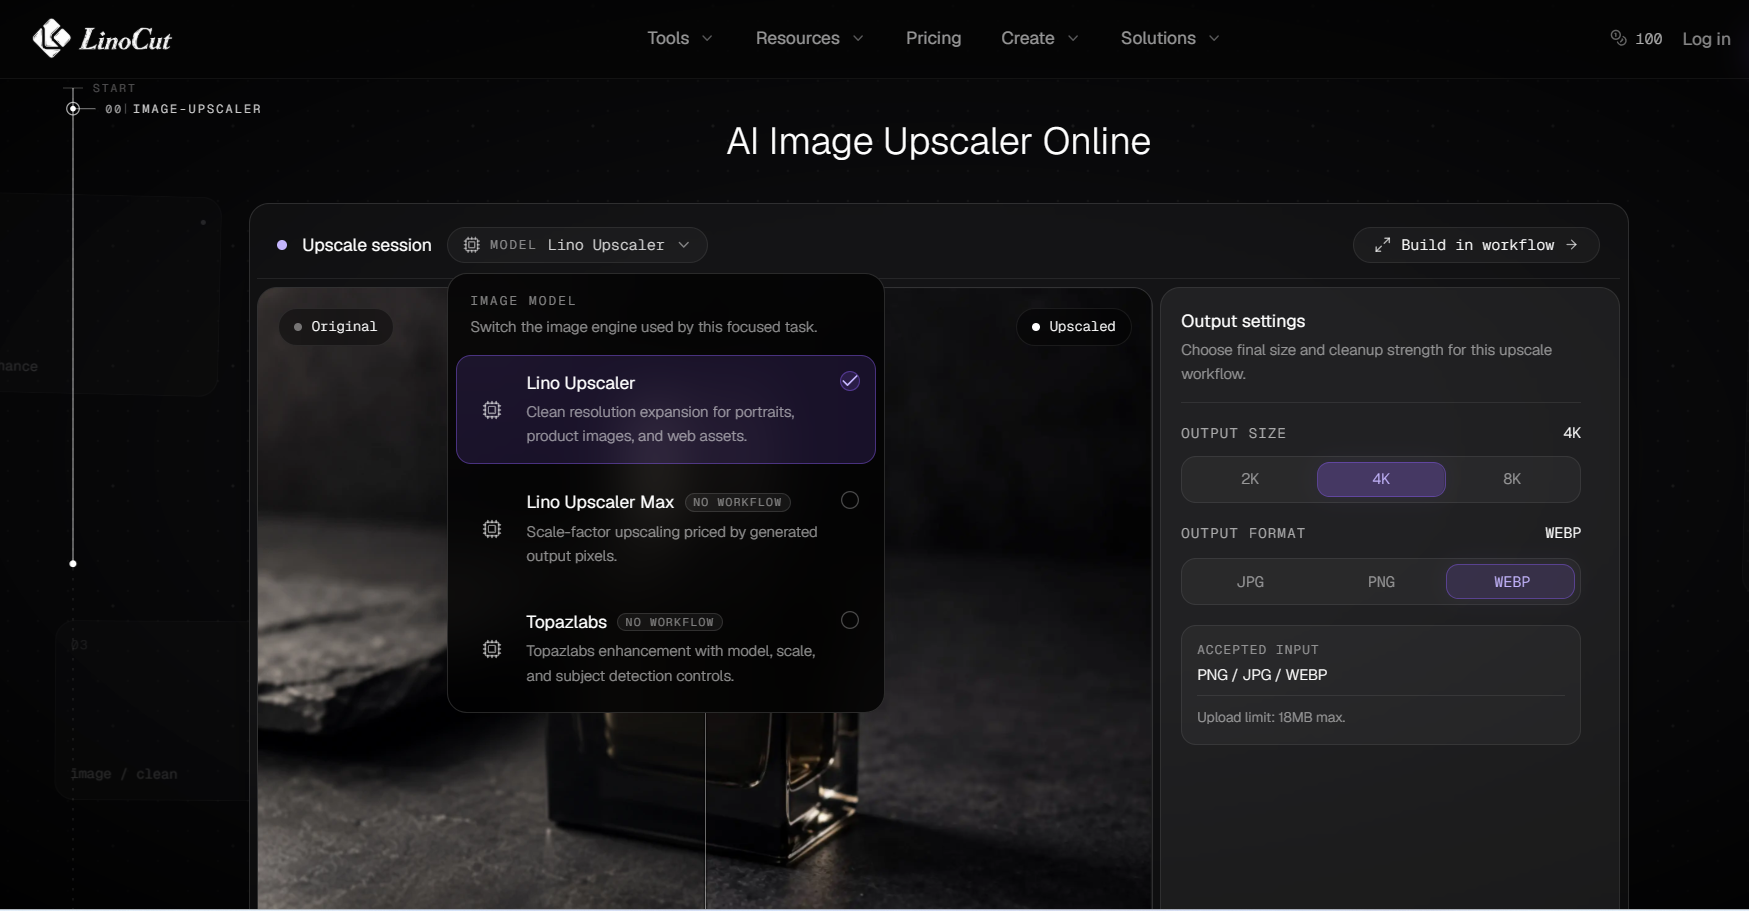
1. LinoCut AI Image Upscaler
Features
- Multiple AI Upscaling Models: Offers several AI-powered enhancement models, including the proprietary Lino Upscaler and advanced Lino Upscaler Max, allowing users to choose the best model for different image types and quality requirements.
- Up to 8K Image Enhancement: Supports image upscaling to 2K, 4K, and 8K, significantly increasing image resolution while preserving natural textures and visual quality..
- Excellent Consistency and Natural Results: Maintains strong facial and object consistency during enhancement. Unlike many AI upscalers, it minimizes artificial-looking artifacts and avoids excessive alterations to the original image.
- Enhanced Details Without Over-Sharpening: Intelligently restores textures, edges, and fine details while preventing over-sharpening, resulting in cleaner and more realistic images.
- Flexible Export Formats: Allows users to download enhanced images in JPG, PNG, or WEBP formats based on their workflow requirements.
- Large File Support:Supports uploading JPG, PNG, and WEBP images up to 18MB in size.
- Perfect for Group Photos and Large Prints:Powered by the advanced Lino Upscaler Max model, LinoCut delivers exceptional results when enhancing large group photos, wedding photos, class photos, event photography, and other images intended for ultra-high-resolution printing.
How to Use
- Upload Your Image: Visit LinoCut AI Image Upscaler(https://linocut.ai/tools/image-upscaler/) and upload a JPG, PNG, or WEBP image..
- Choose an AI Model: Select the most suitable enhancement model, such as Lino Upscaler for general images or Lino Upscaler Max for maximum quality.
- Select Output Resolution: Choose your desired output size, including 2K, 4K, or 8K.
- Start AI Enhancement: Click the enhance button, and the AI will automatically improve image resolution, clarity, and details..
- Download the Result: Export the enhanced image in JPG, PNG, or WEBP format.
Pros
- Multiple AI upscaling models for different use cases.
- Supports image enhancement up to 8K resolution.
- Preserves facial identity and image consistency exceptionally well.
- Produces natural-looking results with minimal AI artifacts.
- Enhances details without creating harsh over-sharpening effects.
- Fast processing speed.
- Excellent performance on portraits, landscapes, e-commerce product photos, and large group photos.
- Ideal for high-quality printing projects.
Cons
- Maximum output resolution is currently limited to 8K.
- Advanced models may require more processing time for very large images.
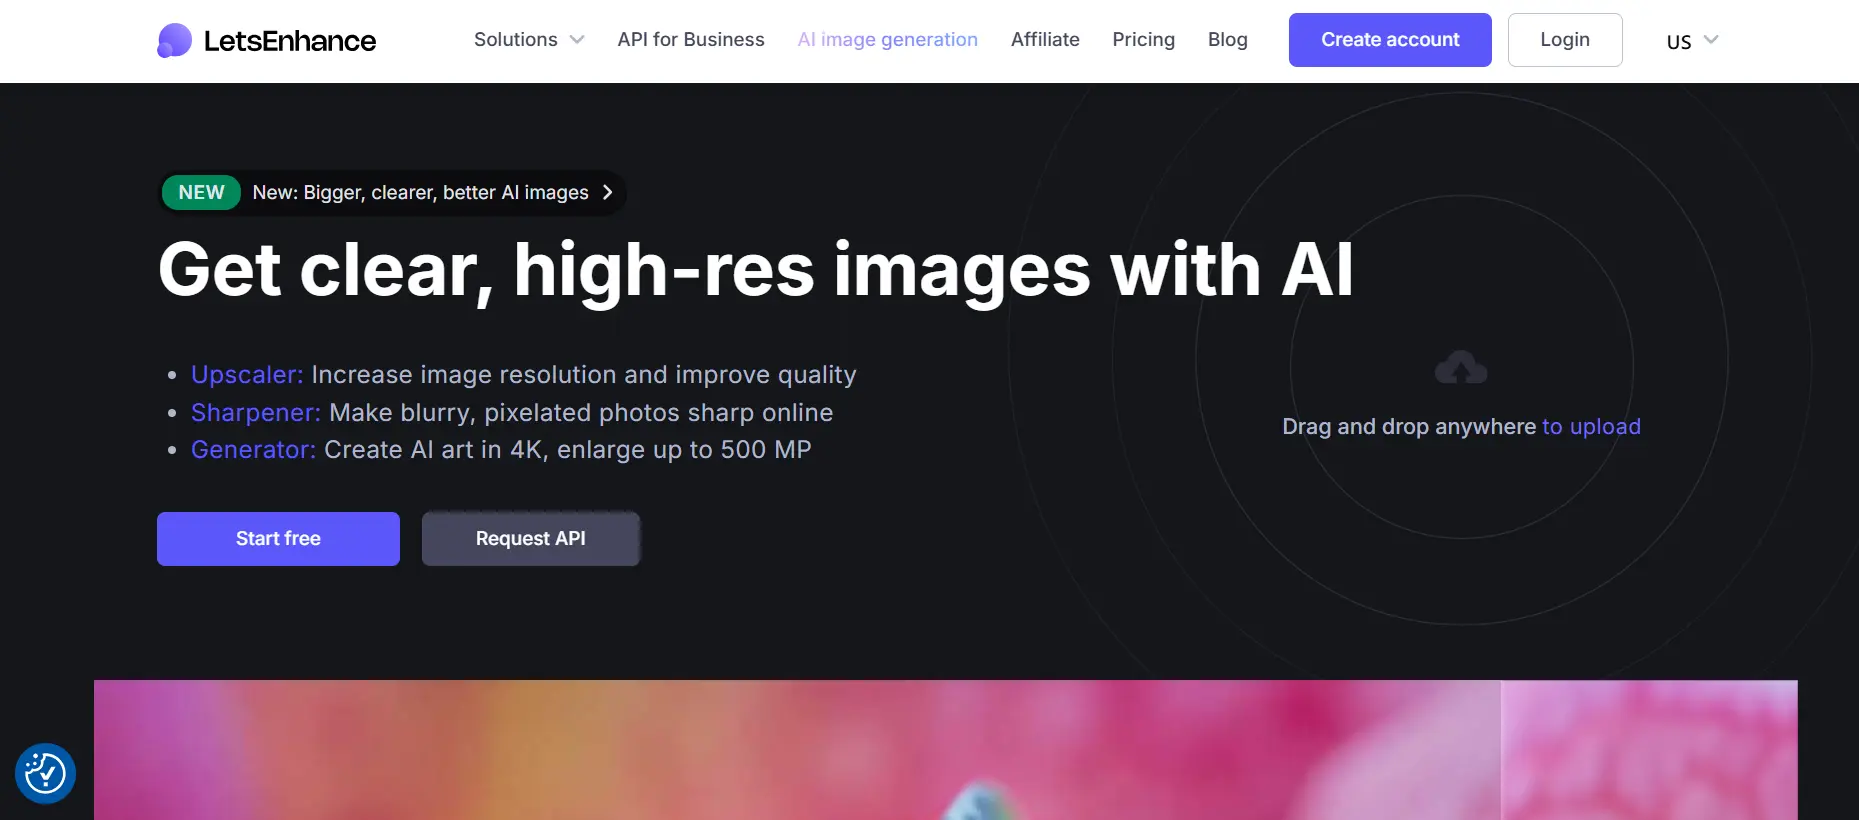
1. Let’s Enhance
Features
- AI-Driven Image Enhancement: Provides super-resolution and color correction features.
- Batch Processing Support: Allows multiple images to be processed at once for efficiency.
- Designed for High-Resolution Printing: Optimizes images for print purposes like posters and banners.
- Built-in Style Enhancements: Adjusts image tone and details to make it more professional.
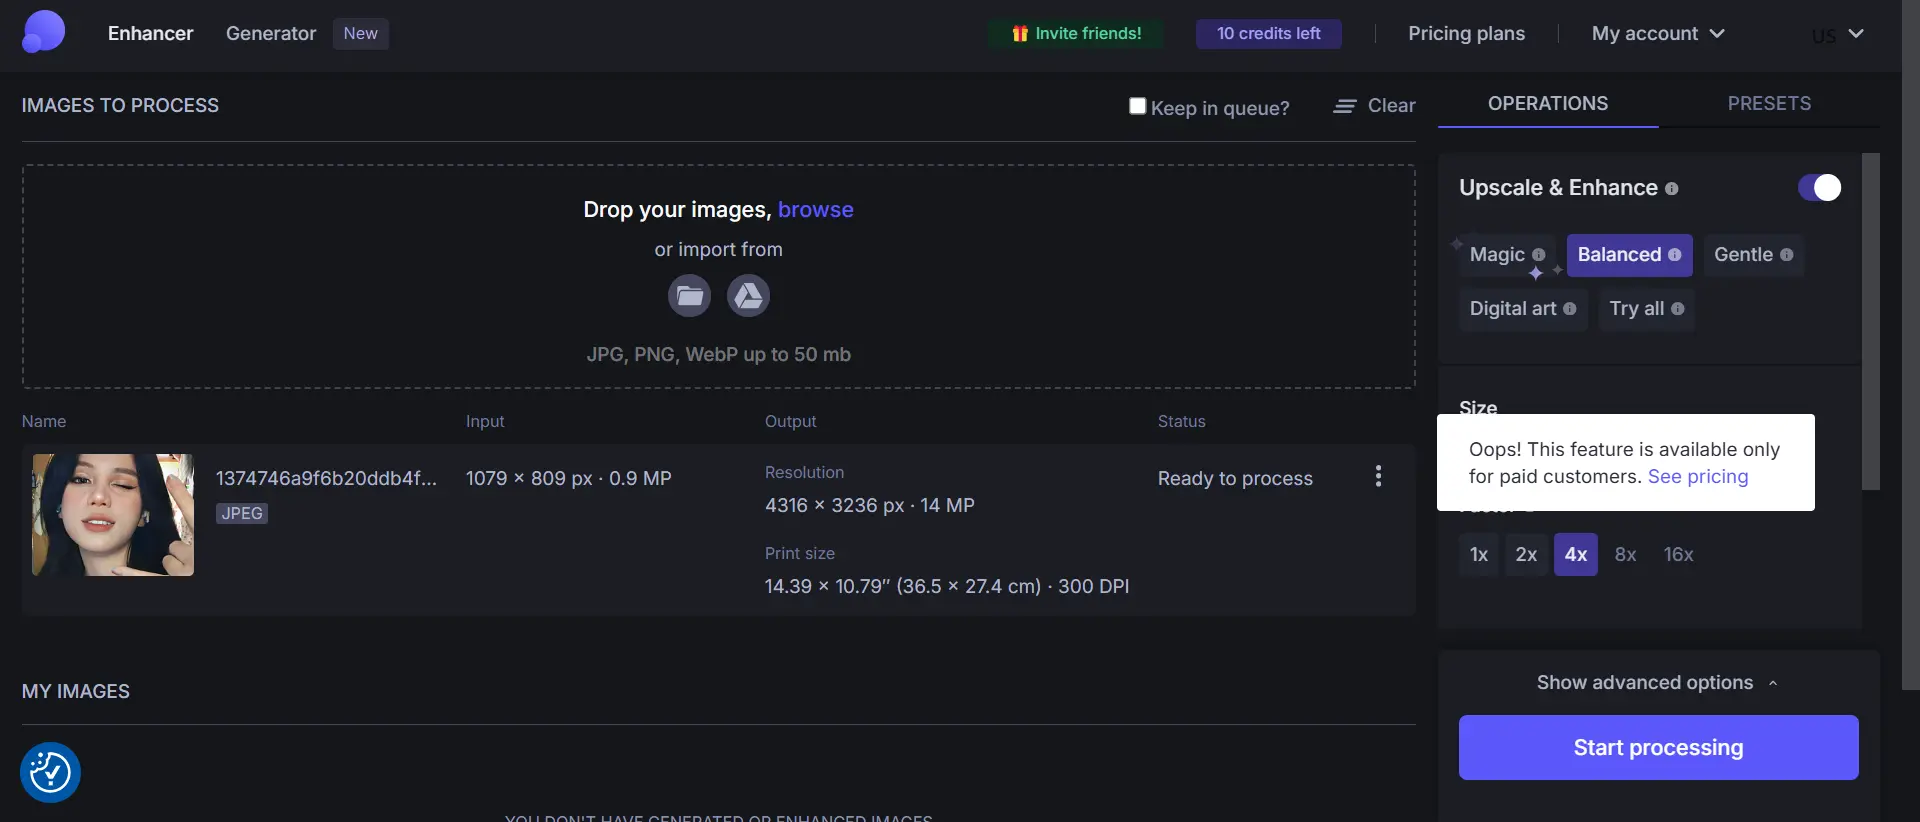
How to Use
- Create an Account: Visit the website and create an account (free or paid subscription).
- Upload Image: Choose the image you want to enhance.
- Select Enhancement Options: Options include resolution adjustment, color correction, etc.
- Process Image: Click to start the process, and AI will automatically enhance the image.
- Download the Result: Save the high-resolution image to your local device.
Pros
- Supports batch processing, ideal for large-scale image optimization.
- High-quality enhancement, especially suitable for print applications.
- User-friendly interface, suitable for non-technical users.
Cons
- Limited features in the free version; a paid subscription is required for high-resolution enhancement.
- Processing speed may be affected by image size and server performance.
2. UpscalePics
Features
- Online Tool: No need to download anything; use directly in your browser.
- Format Flexibility: Supports various image formats such as JPG, PNG, etc.
- Noise Reduction: Reduces noise while enlarging images.
- User-Friendly: Simple drag-and-drop upload, ideal for quick processing.
How to Use
- Open the website.
- Drag and drop your image into the upload area.
- Set the enlargement factor and noise reduction parameters.
- Click the "Upscale" button to start processing.
- Download the processed image file.
Pros
- Simple to use with no learning curve.
- Supports noise reduction and file format conversion, making it versatile.
- Pay-per-image model is suitable for small batch users.
Cons
- Free version has limited features, only suitable for low-demand users.
- Limited ability to restore image details for large images or high-quality requirements.
3. Gigapixel AI
Features
- Deep Learning Technology: Uses AI to intelligently analyze and restore image details.
- High-Performance Processing: Suitable for professional photography, art, and commercial use.
- Multi-Platform Support: Available for both Windows and Mac systems.
- Professional Editing Features: Includes additional detail enhancement options like deblurring and sharpening.
How to Use
- Download and install the software (purchase or trial required).
- Import the image you want to process.
- Set the enlargement factor (e.g., 2x, 4x) and other detail options.
- Start the processing and preview the results.
- Export the final result.
![]()
Pros
- Excellent at restoring image details, ideal for high-demand professional scenarios.
- Offline processing, not reliant on internet speed.
- Offers a one-time purchase option, no need for a long-term subscription.
Cons
- The software is relatively expensive and may not be suitable for casual users.
- Requires significant hardware support, and processing large images may take time.
4. Enhance.Pho.to
Features
- Free Online Tool: No registration required, free to use basic features.
- Multiple Editing Options: Includes exposure correction, red-eye removal, contrast adjustment, etc.
- Lightweight Design: Primarily designed for quick and simple image fixes and enlargements.
- Real-Time Preview: Allows you to view the effect of adjustments in real-time.
How to Use
- Open the website and upload an image.
- Choose the enhancement functions you need, such as noise reduction and color adjustments.
- Click the "Enhance" button to view the real-time preview.
- Download the enhanced image.

Pros
- Completely free, suitable for users on a budget.
- Simple interface, easy to use.
- Quick processing, ideal for immediate needs.
Cons
- Limited functionality, not suitable for professional or high-end needs.
- Basic enhancement, not effective for detailed restoration.
Comparison of Top Image Upscaling Tools
| Tool Name | Key Features | Price | Pros | Cons | Best For |
|---|---|---|---|---|---|
| LinoCut AI | Multiple AI models, 2K/4K/8K upscaling, Lino Upscaler Max, format flexibility | Free & Premium Plans | Natural results, strong facial consistency, minimal AI artifacts, excellent for group photos and printing | Maximum output currently limited to 8K | Portraits, e-commerce images, large group photos, high-resolution printing |
| ImgUpscaler.AI | AI enhancement, batch processing, privacy | Free & Premium Plans | General-purpose upscaling | May require premium for advanced features | General-purpose upscaling |
| Let’s Enhance | High-res printing, AI algorithms | Subscription-based | Professional printing effects, simple to use | Paid version unlocks more features, processing speed limited | Marketing and large prints |
| UpscalePics | Noise reduction, format versatility | Pay-per-image | Flexible, easy to use, no installation | Limited ability to restore fine details | E-commerce product images |
| Gigapixel AI | Deep learning, professional-grade editing | One-time purchase | Excellent detail restoration, offline use | Expensive software, high hardware requirements | Professional photography |
| Enhance.Pho.to | Basic online editing tools | Free | Free to use, fast processing | Basic functionality, not suitable for high-end needs | Quick, simple edits |
Common Mistakes to Avoid When Upscaling Image
When upscaling images, there are some common mistakes to avoid in order to ensure the best results. Here are some key points:
- Over-amplification: Over-enlarging an image can lead to distortion and a decrease in quality. Moderate upscaling should be maintained to preserve clarity and detail.
- Ignoring source image quality: Upscaling low-resolution images does not improve their inherent quality. Always start with the highest resolution possible to achieve the best results.
- Overusing sharpening tools: While sharpening can enhance details, over-sharpening introduces artifacts and noise. Apply sharpening subtly to avoid degrading image quality.
- Ignoring file format: Images in lossy formats like JPEG may degrade in quality after upscaling. Choose lossless formats such as PNG or HEIC to preserve details.
- Ignoring aspect ratio: Failing to maintain the correct aspect ratio during upscaling can result in stretched or distorted images. Ensure the ratio remains consistent to keep the image natural.
- Relying solely on automated tools: Although AI tools are powerful, they are not infallible. Combining automated upscaling with manual adjustments can yield better results.
- Neglecting post-processing: Images after upscaling often require additional post-processing. Adjusting contrast, brightness, and sharpness can enhance the final appearance.
- Ignoring compression artifacts: Over-compressed images may exhibit blocky artifacts when upscaled. Use tools that reduce artifacts during enhancement.
- Not using high-resolution original images: Upscaling low-resolution images amplifies their flaws. Always start with the highest resolution file available.
- Neglecting sharpness enhancement: Enlarged images may lose sharpness. Utilize AI tools to restore clarity and focus.
- Using inefficient software: Avoid outdated methods that rely on basic interpolation. Choose advanced tools like imgupscaler.ai for professional-level results.
By avoiding these common mistakes, you can help ensure that the upscaled images remain clear and high-quality.
Conclusion
Upscaling low-resolution images is no longer a tedious process, thanks to modern AI technologies. Among the many tools available, ImgUpscaler.AI and LinoCut stands out as a versatile, user-friendly option that guarantees high-quality results.
Whether you're revitalizing old photographs, enhancing digital artwork, or improving e-commerce visuals, investing in the right tools can transform your images into stunning, high-resolution visuals. Start your upscaling journey today with ImgUpscaler.AI and make pixelation a thing of the past!